


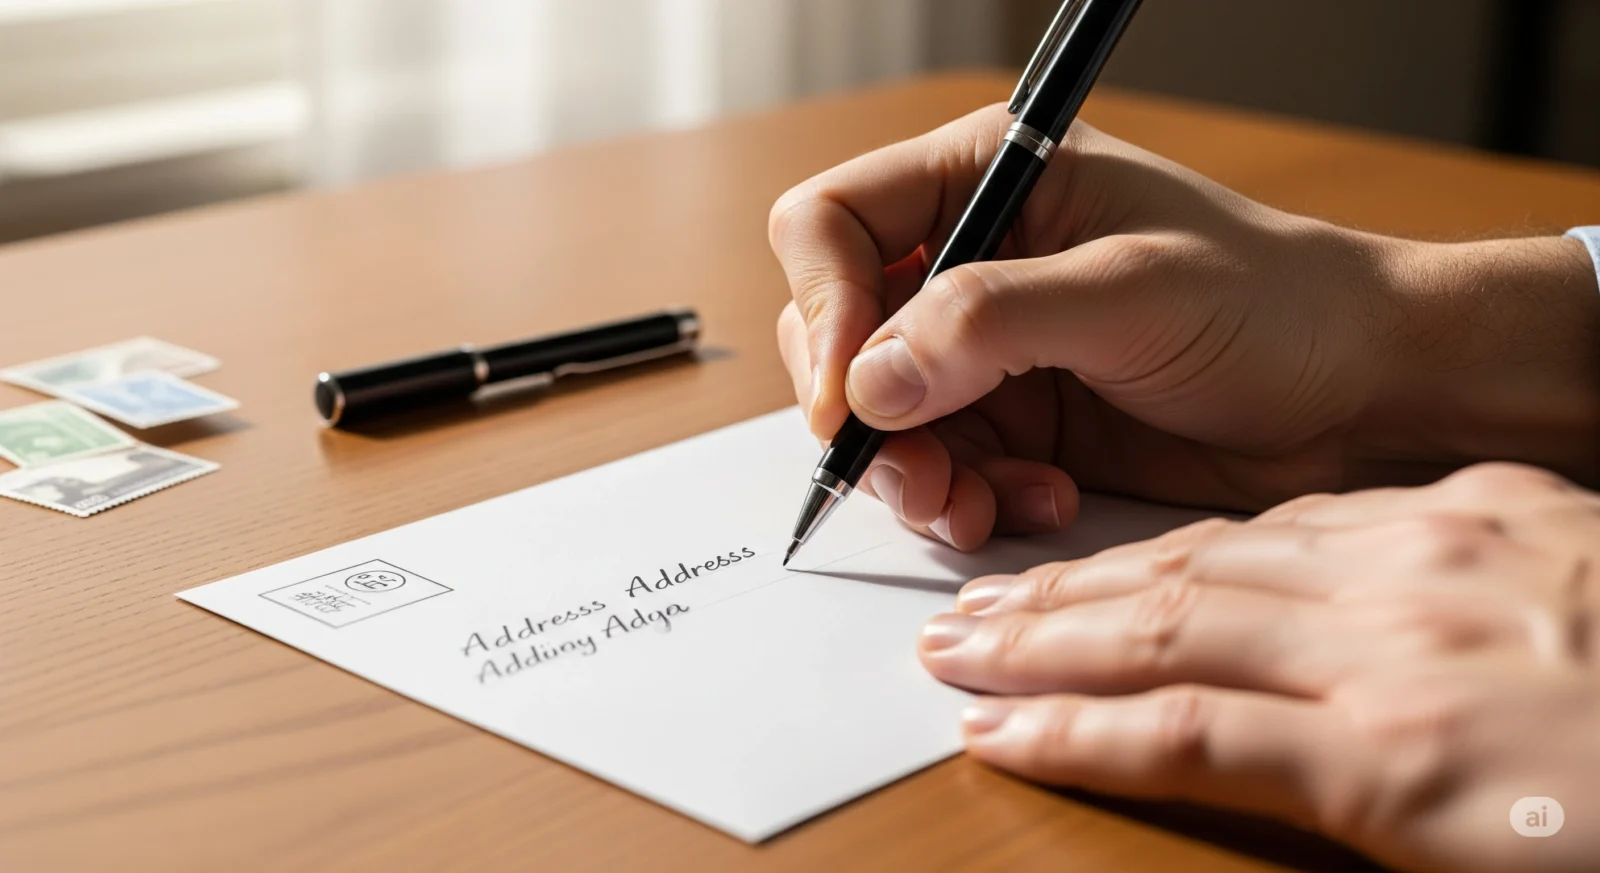
Learning how to address an envelope correctly is a simple skill that ensures your letters and cards arrive safely. If you’ve ever felt unsure about the proper format in our digital world, you’re not alone. This guide breaks down the entire process into easy, clear steps, giving you the confidence to mail anything, anywhere.
“A properly addressed envelope is like a clear map for your mail carrier. It’s the simple difference between your heartfelt message arriving safely or getting lost along the way.”
Why Proper Addressing Is Important
Even with digital communication, physical mail holds a special place. Important documents, heartfelt birthday cards, and official notices all rely on the postal system. A correctly addressed envelope is the key to ensuring your mail reaches its destination quickly and without issues.
Think of the address as a clear map for the postal service. A proper format prevents delays, stops mail from getting lost, and makes the entire delivery process more efficient. Taking a moment to get it right is well worth the effort.

The 5 Simple Steps to Address an Envelope
Learning how to address an envelope is easy once you understand the two key sections: the return address and the recipient’s address.
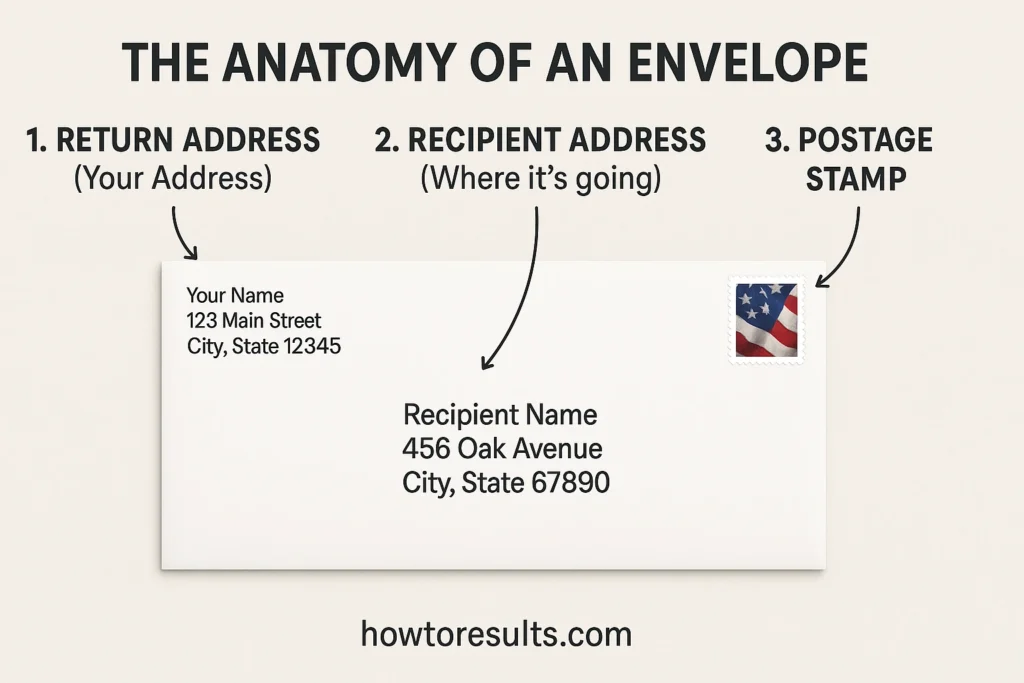
Step 1: Write the Return Address
The return address identifies you, the sender. It belongs in the top-left corner of the envelope. This information is crucial. If the post office cannot deliver the letter for any reason, they will use this address to return it to you.
- Line 1: Your Full Name
- Line 2: Your Street Address (e.g., 456 Oak Avenue)
- Line 3: Your City, State, and ZIP Code (e.g., Anytown, TX 75001)
Step 2: Write The Recipient’s Address
This is the main delivery address—where the letter is going. This address should be written in the center of the envelope. Write largely and clearly so it’s easy for mail-sorting machines and postal workers to read. This is the most critical part of how to address an envelope.
- Line 1: The Recipient’s Full Name (e.g., Jane Doe)
- Line 2: Their Street Address (e.g., 123 Pine Street)
- Line 3: Their City, State, and ZIP Code (e.g., Somewhere, CA 90210)
Step 3: Use the Correct Format
The way the address is written matters for automated sorting. Follow this simple format for both addresses to ensure machines can read it without errors. Following the correct format is key to understanding how to address an envelope for automated machines.
- Use a pen with black or dark blue ink.
- Write in clear, printed letters. Using all uppercase letters is ideal for machine readability.
- Do not use commas or periods at the end of the address lines.
- Ensure the City, State, and ZIP code are together on the final line.
Step 4: Double-Check Your Work
Before sealing the envelope, take 10 seconds to double-check everything. This is the easiest way to prevent a letter from getting lost.
- Is the recipient’s name spelled correctly?
- Is the street number and name accurate?
- Did you use the correct ZIP code? A quick search on the USPS ZIP Code Lookup tool can prevent a simple mistake. (This is our recommended external authoritative link).
- Is the return address present and correct?
Step 5: Place the Stamp
The final step is postage. A stamp pays for your letter’s journey. Place a single postage stamp firmly in the top-right corner of the envelope. Be careful that it doesn’t cover any part of the return or recipient addresses.
With that, your envelope is perfectly addressed and ready for the mailbox.
7 Pro Tips for How to Address an Envelope Flawlessly

For the best results and fastest delivery, follow these helpful tips.
- Use All Caps: Postal sorting machines read uppercase letters more easily, which reduces the chance of errors.
- Avoid Fancy Fonts: If printing labels, choose simple, clear fonts like Arial or Helvetica. Save creative lettering for the card inside.
- No Commas, No Periods: Omit punctuation from the address block. For example, write ANYTOWN TX 75001 instead of Anytown, TX. 75001.
- Check the ZIP+4: For even more precise delivery, use the full nine-digit ZIP code, which can be found on the USPS website.
- Use a Good Pen: Ballpoint or gel pens with dark, permanent ink are best. Avoid markers that can bleed if wet or pencils that can smudge.
- Keep Edges Clear: Leave the bottom half-inch of the envelope completely blank. The post office uses this area for its processing barcodes.
- Protect the Contents: If sending something you don’t want bent, write “Do Not Bend” on the envelope, preferably between the return and recipient addresses, or use a rigid mailer.
How to Address an Envelope: Common Mistakes to Avoid
- Forgetting the Return Address: Without it, a lost letter cannot be returned to the sender.
- Placing the Stamp Incorrectly: The stamp must be in the top-right corner to be processed correctly.
- Using a Nickname: Use the recipient’s full, formal name when possible to avoid delivery confusion.
- Over-Abbreviating: While state abbreviations (e.g., CA) are standard, avoid making up abbreviations for street names. Use common ones like ST for Street or AVE for Avenue.
How to Address an Envelope: Common Variations
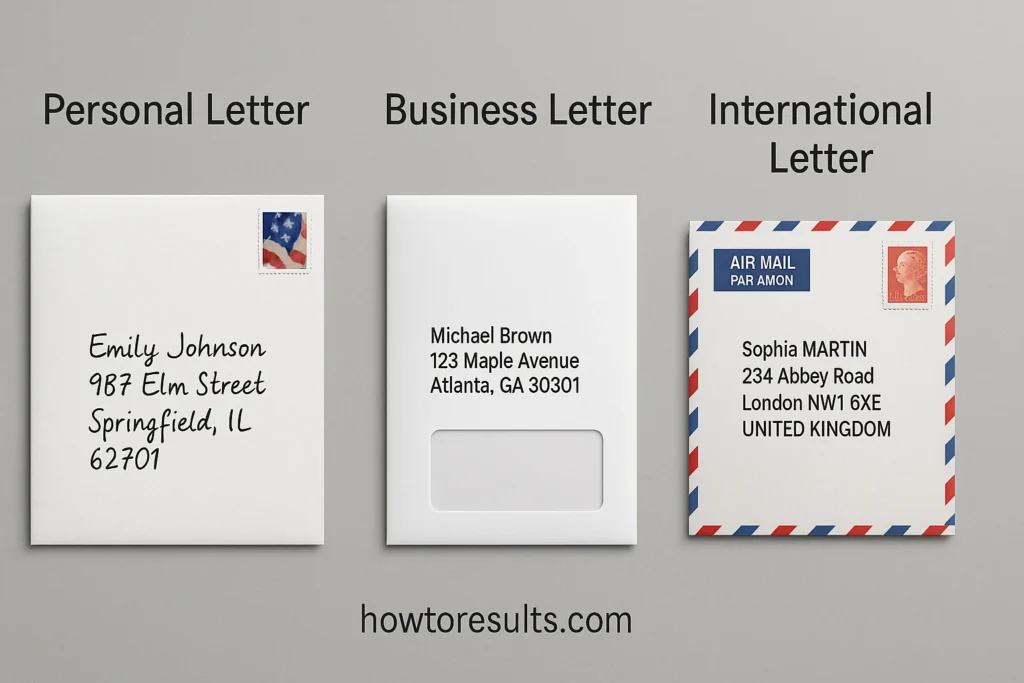
Addressing an Envelope with an Apartment Number
If the recipient is in an apartment, suite, or unit, that information goes on the same line as the street address, or on the line directly above the city/state/ZIP.
Example:
- JANE DOE
- 123 PINE STREET APT 4B
- SOMEWHERE, CA 90210
Addressing a Letter to a P.O. Box
When sending mail to a Post Office Box, a street address is not needed. The P.O. Box number serves as the primary address line.
Example:
- JOHN SMITH
- PO BOX 9876
- ANYTOWN, TX 75001
How to Address an International Envelope
Sending mail to another country requires two small additions.
- Write the recipient’s address using the format standard for that country.
- On the very last line, write the full COUNTRY NAME in all capital letters.
- Ensure you use the correct amount of international postage.
Example:
- ANNA KOVACS
- 789 HIGH STREET
- LONDON W1J 9L
- UNITED KINGDOM
Troubleshooting Common Issues When You Address an Envelope
- “My handwriting is messy.” It is always better to print letters clearly. Using all caps is a great way to ensure readability. Alternatively, you can print a label from a computer.
- “I made a mistake.” For a minor error, white-out correction fluid or tape is acceptable. For a major error, it is always best to use a new envelope to prevent confusion for postal scanners.
- “The address is too long to fit on one line.” Place overflow information, such as a suite or apartment number, on the line directly above the city, state, and ZIP code line.
Conclusion: You’re Ready to Send!
Knowing how to address an envelope is a fundamental skill that ensures your letters and documents arrive as intended. By following these 5 simple steps and keeping the helpful tips in mind, you can be confident that your mail is on the right path.
If you have more queries or wish to explore other guides, please visit HowtoResults.
FAQs
Where does the stamp go on an envelope?
The postage stamp always goes in the top-right corner of the envelope.
Do I really need to include a return address?
Yes, absolutely! The return address (your address) in the top-left corner ensures your letter can be returned to you if it’s undeliverable for any reason.
What’s the best way to write when learning how to address an envelope, print or cursive?
It is much better to use clear, simple print. Postal service scanning machines can read print, especially all-caps print, more accurately and quickly than cursive.
What kind of pen should I use to address an envelope?
Use a pen with permanent black or dark blue ink, like a ballpoint or gel pen. Avoid using pencils that can smudge or light-colored inks that are hard to read.
How do I write an address for a military member (APO/FPO)?
For military mail, you’ll replace the city with APO (Army Post Office) or FPO (Fleet Post Office) and the state with AE (Armed Forces Europe), AP (Armed Forces Pacific), or AA (Armed Forces Americas). Do not include the country or city names.
What if I don’t know the person’s ZIP code?
It’s crucial to include the correct ZIP code. You can easily look it up for free on the official USPS website using their ZIP Code Lookup tool.
Can I put stickers or drawings on the envelope?
Yes, but keep them away from the addresses and the stamp. The post office needs clear space to read the address and print its own barcodes. The best place for decoration is the back of the envelope or the far-left side.
What is the difference between a P.O. Box and a street address?
A street address is for a physical location like a house or apartment building. A P.O. Box is a locked mailbox located inside a post office that a person rents.
How do I format a business or company name in the address?
Put the person’s name on the first line (if you know it), their title on the second line, the company name on the third, and then the street address below that.
Does the format change for a larger envelope?
No, the format stays exactly the same. Your return address goes in the top-left, the recipient’s address goes in the center, and the stamp goes in the top-right, regardless of the envelope’s size.